How do I take injectable Semaglutide?
Injectable Semaglutide: How to Take Your Medication
Frequency
- Injectable Semaglutide is taken once weekly on the same day each week
- It can be taken any time of day, with or without food
Before You Begin
Review Your Dosage and Medication Information
- Your package includes a guide with your specific dosage, schedule, and instructions for increasing your dose.
- Read this carefully before preparing your medication.
- Providers often begin with a lower dose so the body can become accustomed gradually. Individual responses vary.
- Do not increase your dose on your own.
- Inject only once per week (or as directed by your doctor).
Measuring Your Dose
- Each vial contains 1 mL (100 units) and lasts 4 weeks.
- You will always inject 25 units per week; the concentration of Semaglutide in the vial changes to match your prescribed dose.
- Your provider will determine your dosing schedule. Dose adjustments may occur gradually over time depending on your response, tolerance, and medical needs.
- Key point: Injection volume stays the same (25 units/week); only the concentration changes.
- Syringes are measured in increments of 10 units; for 25 units, draw to the halfway point between 20 and 30 units.
- Follow your provider’s instructions about storage, usage, and discarding unused medication.
Quick Tips for Success
- Set a Weekly Reminder: Use your phone or calendar to track your injection day and units.
- Track Your Progress: Keep a journal of how you feel and any changes.
- Support Overall Health: A balanced diet and regular activity may support your overall health while using this medication.
Injection Instructions
- Prep the Vial: Remove the cap and wipe the rubber stopper with an alcohol swab.
- Draw Air into Syringe: Draw the same amount of air as your dose (e.g., 25 units).
- Inject Air and Draw Medication: Inject the air into the vial, invert it, and draw solution past your dose. Remove any air bubbles and push excess solution back until you reach the prescribed dose.
- Prep Injection Site: Clean your injection site with an alcohol swab.
- Inject Medication: Pinch your skin (stomach sides, thighs, or upper arms), insert the needle at a 90° angle, and inject the full contents.
- Dispose of Syringe Safely: Remove needle, recap syringe, and place in an FDA-cleared sharps container or sturdy plastic container with a tight-fitting lid. Do not dispose in household trash.
Pamphlet
 Side 1
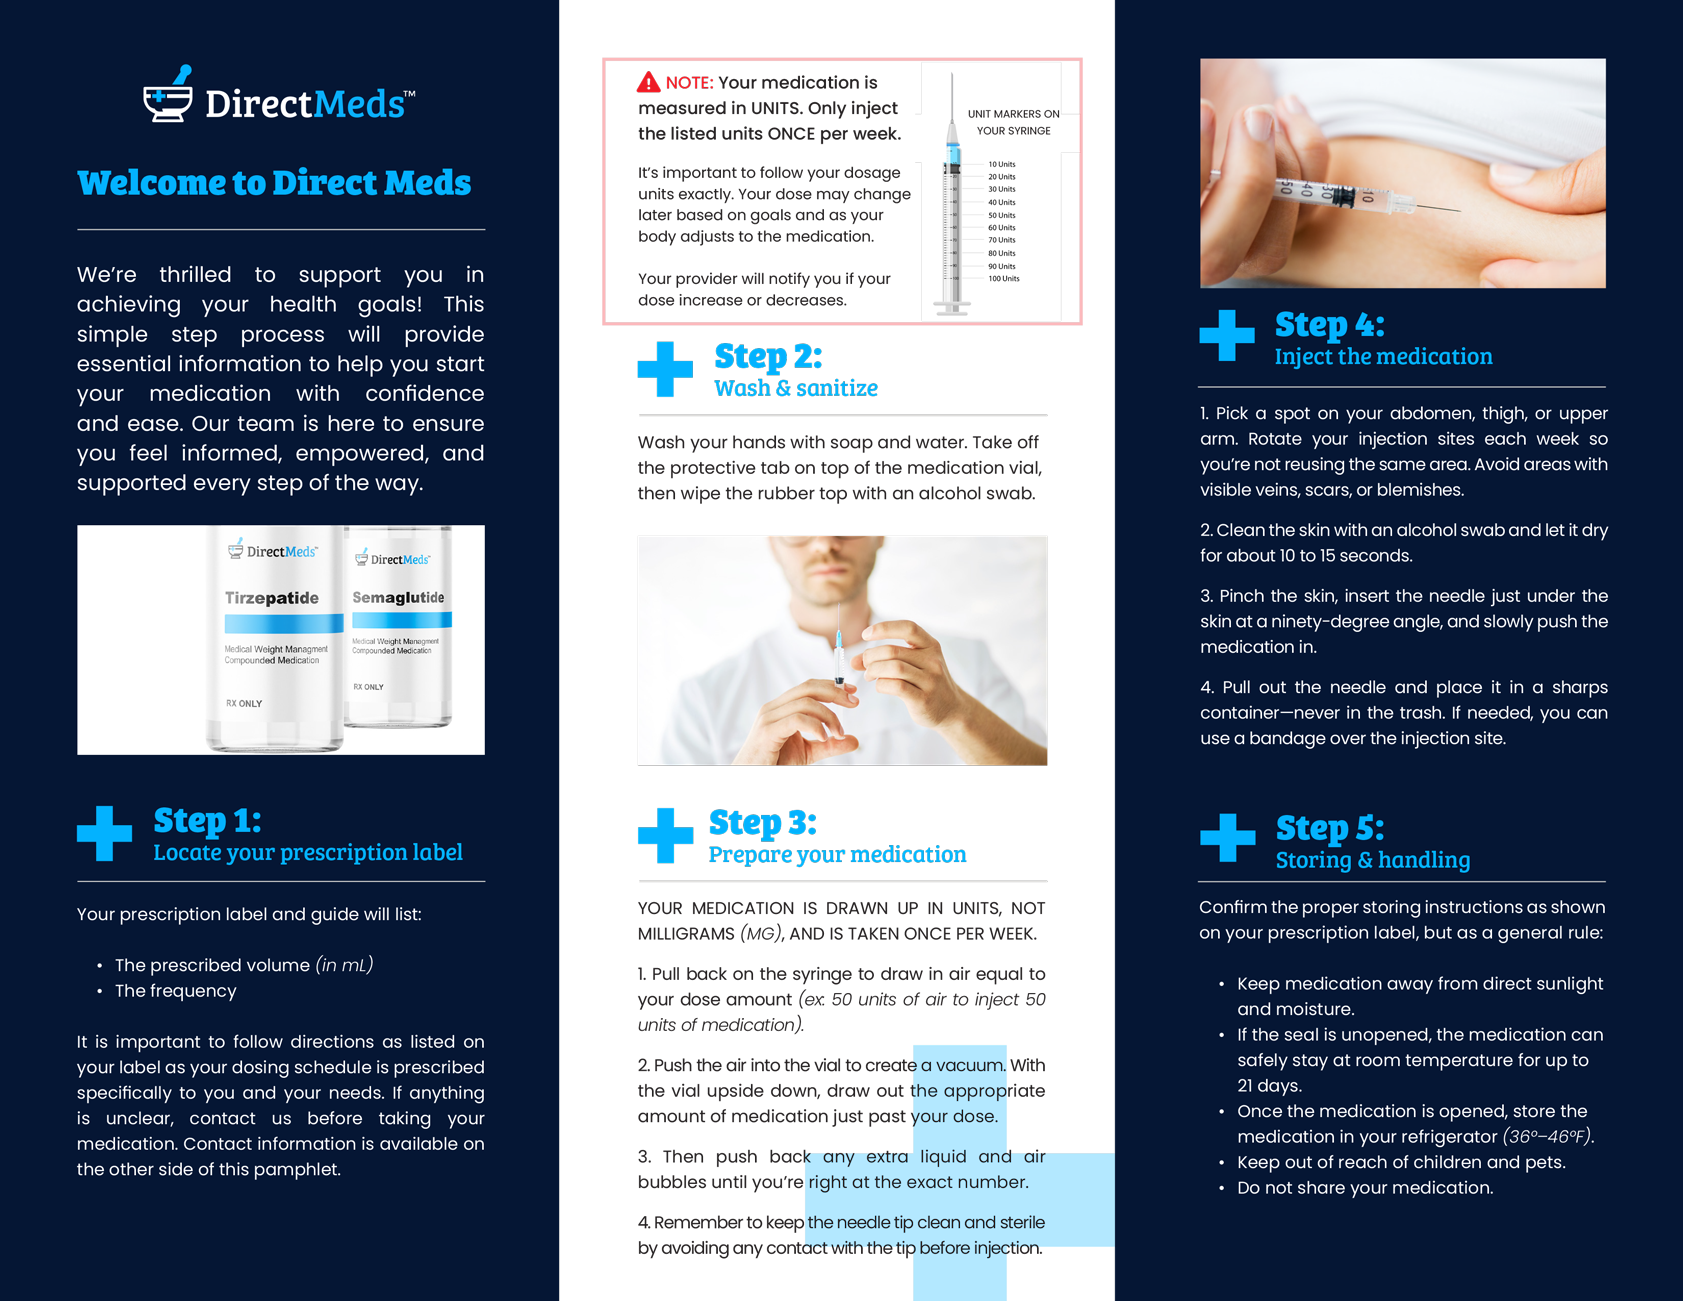 Side 2

Compounded medications are not FDA-approved. They are prepared by licensed compounding pharmacies under medical supervision and may differ in formulation, dosing, and supporting evidence from FDA-approved products.

This article is for general informational purposes only and does not provide medical advice, diagnosis or treatment for any specific person.
Related Articles
What dosage of injectable Semaglutide will I be taking?
Injectable Semaglutide: How to Take Your Medication Frequency: Taken once weekly, on the same day each week, at any time of day, with or without food. Doctor Guidance: Your doctor will determine the appropriate dose for your individual needs. Always ...How much weight will I lose with injectable Semaglutide?
GLP-1 Medications and Weight Loss People taking GLP-1 medications like semaglutide often experience significant weight loss when these medicines are combined with a reduced-calorie diet and increased physical activity. Large clinical trials of ...What's included in the injectable Semaglutide package?
When you receive your injectable Semaglutide medication in the mail, it will include everything needed for your weekly injection: Medication Vial: This contains your prescribed compounded semaglutide medication. Insulin Syringes: Pre-packaged for ...Is injectable Semaglutide safe?
Semaglutide injections (for example, the FDA-approved medications Wegovy® and Ozempic®) have been studied in clinical trials and, when used under the supervision of a licensed healthcare provider, can have a favorable benefit-risk profile for ...What Is Injectable Semaglutide & How Does It Work?
About Semaglutide Semaglutide is a prescription medication that has been FDA-approved in specific formulations to treat type 2 diabetes and, separately, for chronic weight management (under brand names like Ozempic® & Wegovy®). These FDA-approved ...